-
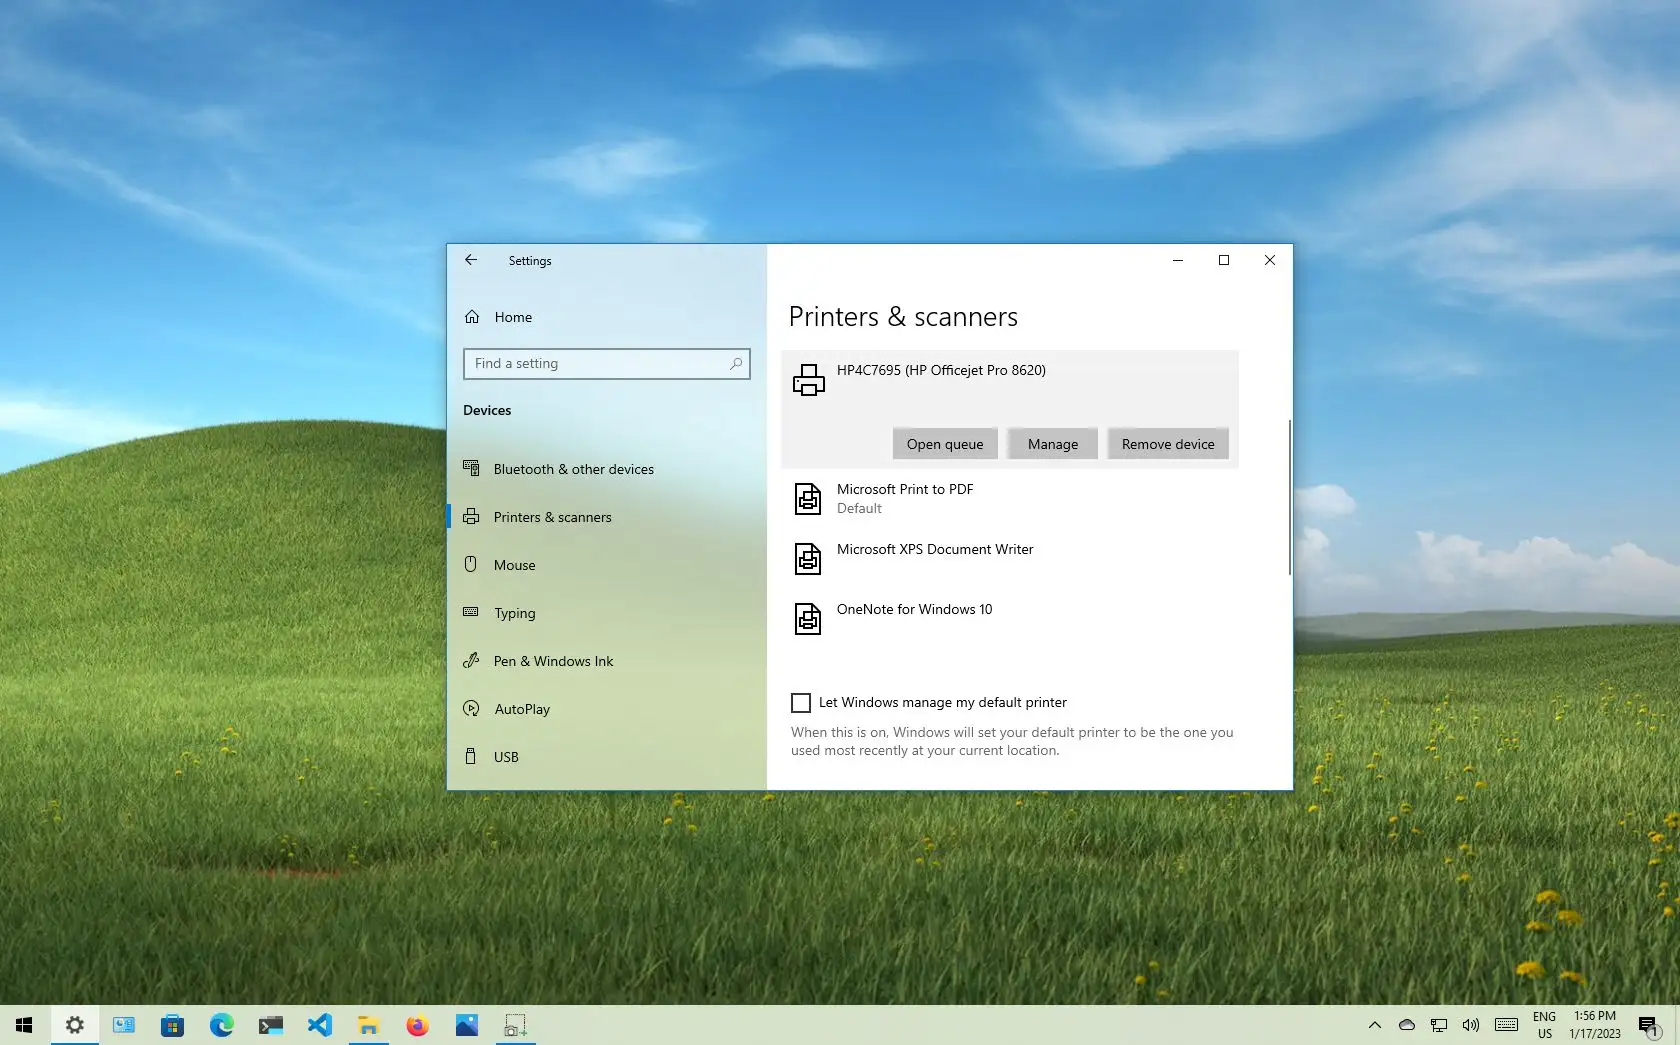
To change the default printer on Windows 10, open
Settings
>
Printers & scanners,
click the
“Manage”
button on the printer, and click the
“Set as default”
button. -
You may also need to turn off the
“Let Windows manage my default printer”
option to enable the option to change the default settings.
You can quickly change the default printer on Windows 10 through the Settings app, but you must disable a specific setting before the option becomes available, and in this guide, I’ll show you how.
On
Windows 10
, you probably noticed that the default printer keeps changing when you have multiple printers configured on your computer. This is because the operating system has a feature that sets your most recently used printer as the default automatically.
While allowing the operating system to change the default printer automatically can be a handy feature, it’s not something for everyone. If you must set a specific printer as the default, you first need to disable the feature to prevent the system from making changes to the printer settings, and then you have to choose the new default printing device.
This
guide
will teach you the steps to choose the default printer on Windows 10.
Change default printer on Windows 10
To change the default printer on Windows 10, use these steps:
Open
Settings
on Windows 10.
Click on
Devices
.
Click on
Printers & scanners
.
Clear the
“Let Windows manage my default printer”
option.

Select the printer to make the new system default and click the
Manage
button.
Click the
“Set as default”
button to set the default printer on Windows 10.

Once you complete the steps, the new printer will become the default on Windows 10.