-
To create an automatic file backup on Windows 11, open
Control Panel
>
System and Security
>
File History
, and click
Turn on.
-
To back up files automatically from Windows Backup, open
Control Panel
>
System and Security
>
Backup and Restore (Windows 7)
, click
Set up backup,
choose the backup location, then
Let me choose
and select the files back up with the tool, confirm the schedule and save the settings. -
Alternatively, you can do automatic file backups with OneDrive, open
Settings
>
Accounts
>
Windows Backup
, click
Manage sync settings,
choose the files to upload and backup in OneDrive, and click
Start backup.
This post will show you how to use OneDrive, File History, and Windows Backup to automatically create backups of your documents and files on Windows 11 in order to safeguard your data from corruption, hardware failure, and inadvertent deletion.
In order to guard against data loss, File History is a function that makes incremental backups of files to an external or network-shared drive throughout the day. Users having a lot of data, like project files, software collections, audio, and video, would benefit more from this option. This solution’s sole drawback is that data won’t be safeguarded from natural disasters because these backups are local. Additionally, your computer must always be connected to the external drive. Backups won’t function otherwise.
Another option that lets you backup your files to a network folder or portable storage is Windows Backup. With the exception of Windows Backup, which also allows you to build a backup of the system files, the capability functions similarly to File History. Additionally, backups can only be scheduled once every day. Your files will be safeguarded against unintentional deletion, hardware malfunction, and system corruption because the backups are kept locally, but not against natural disasters. For full backup creation or long-term archiving, Windows Backup is more appropriate.
When creating a file backup on Windows 11, Microsoft recommends using OneDrive. This is due to the fact that as soon as you log in and begin saving files to the OneDrive folder, an automated backup is made. Since the files are kept in the cloud, they are also safe from natural disasters and accessible from any device. The only issue with this approach is that in order to use the 1TB of storage, a subscription is needed.
You will discover the several methods for backing up your files on Windows 11 in this guide.
-
Create file backup on Windows 11 from File History
-
Create file backup on Windows 11 from Windows Backup
-
Create file backup on Windows 11 from OneDrive
Create file backup on Windows 11 from File History
Follow these instructions to use File History on Windows 11 to automatically backup files:
Launch Windows 11.
To launch the application, select the top result from the SearchControl Panel.
Select “System and Security.”
Select “File History.”

To enable Windows 11’s automatic file backup, click the Turn on button.

(Selective) From the left pane, select the Advanced Settings option.
Select the Save copies of files setting under the Advanced settings section to determine how frequently File History should make incremental backups of your data automatically.

Use the Keep saved versions setting to select the backup retention.
To save the changes, click the button.
(Selective) From the left pane, select the “Exclude Folders” option.
Press the “Add” button.

Choose which folder location to leave out of the backup.
To select a folder, click the button.
To save the changes, click the button.
File History will backup your Windows 11 files to an external drive when you finish the procedures.
You can examine errors and other events produced by File History in the Event Logs area of the Advanced Settings page, which also has an option to launch the Event Viewer.
Restore files from File History
Follow these steps to recover files from Windows 11’s File History:
Launch Windows 11.
To launch the application, select the top result from the SearchControl Panel.
Select “System and Security.”
Select “File History.”
From the left pane, select the “Restore personal files” option.
To recover your files, use the back and forth buttons to go back in time.
Choose which Windows 11 files to restore.
To restore the files to their original place, click the Restore(green) button.

The files will be restored to the designated location after the procedures are finished.
Create file backup on Windows 11 from Windows Backup
You may also make automatic incremental backups of your papers, photos, movies, and other items with the Windows Backup feature.
Use these procedures to set up Windows Backup to create automatic file backups:
Launch the Control Panel.
Select “System and Security.”
On Windows 7, select Backup and Restore.

Click the “Set up backup” option under the “Back up or restore your files” section.

Choose a location for the backup, such as a secondary drive or USB external storage.

Press the “Next” button.
Click on the “Let me pick” option.

Press the “Next” button.
Make all of the default choices disappear.
Under the Computer section, select the folders and locations with files you want to include the backup for example,Desktop, Documents, Pictures, Videos,andDownloadsfolders, and secondary drives with data.

(Optional) Since you have a file backup, remove the option to include a system image of the drives.
Press the “Next” button.
Press the button labeled “Change schedule.”

Verify the option to run backups on a schedule.
From the How often drop-down menu, choose the Daily option.
Select when you want to run backups (for example, 7:00 PM) from the What time drop-down menu.

Press the “OK” button.
To run the backup, click the “Save settings” button.
Once you complete the steps, the backup process will begin for the first time, and then follow-up backups will be performed on schedule.
Restore files with Windows Backup
To restore files from Windows Backup, use these steps:
Launch the Control Panel.
Select “System and Security.”
On Windows 7, select Backup and Restore.
Under the Back up or restore your files section, click theRestore my files backupoption.

(Selective) Click theChoose a different dateoption to restore the previous version of the file.
Click theBrowse for filesorBrowse for foldersbutton to restore a file or folder.

Select the file or folder depending on the data you want to restore.
Click theAdd filesorAdd folderbutton.
Press the “Next” button.
(Selective) Select theIn the following locationoption.
To browse, click the button.
Select the new location to restore the files and folders.
Check theRestore the files to their original subfoldersoption.
Click theRestorebutton.
Press the “Finish.” button.
Once you complete the steps, the files and folders will be restored to your specified location.
If you use an external drive, keep it connected to the computer. Otherwise, the file backup will fail, and if something happens, you may not be able to recover your files.
Create file backup on Windows 11 from OneDrive
To create file backups automatically to OneDrive on Windows 11, use these steps:
Open the settings.
Select “Accounts.”
Click theWindows backuptab.
Click theManage sync settingsbutton in the OneDrive folder syncing setting.

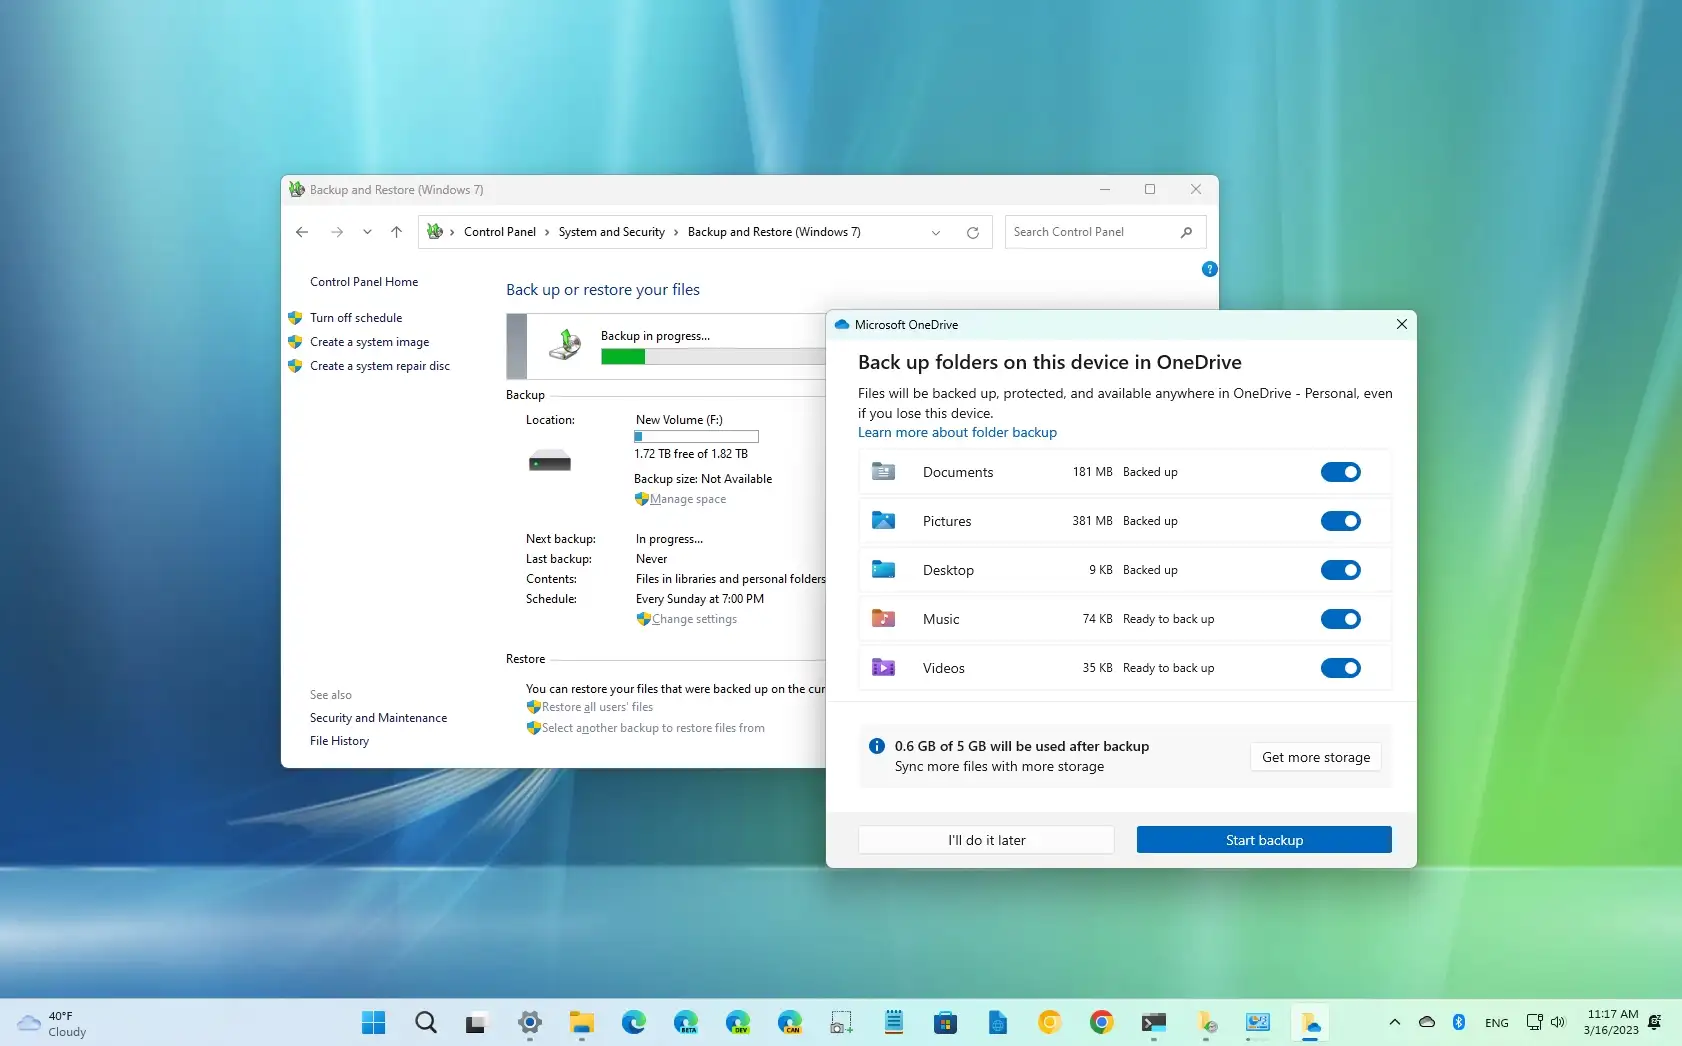
Turn on the toggle switch for files to back up in the cloud, includingDesktop,Documents,Pictures, Music,andVideos.

Click theStart backupbutton.
Once you complete the steps, the account folders will back up automatically to OneDrive as new changes are made on Windows 11.
If you have more than 5GB worth of files, you will have to acquire aMicrosoft 365 subscriptionto access the full 1TB of storage. In addition to the OneDrive storage, the subscription also includes access to the suite of Office apps and many other benefits.
Recover files from OneDrive
As files upload to your cloud storage account, if anything happens to the computer or data, you can restore the files from OneDrive on the web or from another installation of Windows 11. If you accidentally delete a file, it will continue to be recoverable for 30 days from the OneDrive recycle bin.
To restore a file with OneDrive, use these steps:
OpenOneDrive(web).
Sign in with your credentials (if applicable).
Click onRecycle binfrom the left pane.
Select the file or folder.

Click theRestorebutton.
Once you complete the steps, the file will download again on your computer running Windows 11.