If your computer is taking a long time to boot up on Windows 11, there are a few things you can do to speed it up before you consider upgrading the hardware.
There are various methods to increase the speed at which your desktop or laptop computer boots up. To improve drive efficiency, you can, for instance, turn on the Fast Startup feature, turn off apps at startup, select a different power mode optimized for performance, and free up space. To find and eliminate any malware that might be interfering with boot performance, you can also run a virus scan. You can enhance system and startup performance on older computers by defragmenting the drive. Additionally, you should think about increasing the hard drive and memory if nothing seems to work.
This post will show you eight techniques to make your Windows 11 PC boot up faster.
Speed up boot time on Windows 11
There are numerous ways to increase your computer’s startup speed on Windows 11.
1. Enable Fast Startup
A feature called “Fast Startup” speeds up the system’s startup and shutdown times by combining hibernation and frequent shutdown. If the function isn’t activated by default, you should activate it to expedite Windows 11’s boot time.
Follow these steps to enable Windows 11’s Fast Startup:
Launch Windows 11.
To launch the application, search for “Control Panel” and select the top result.
Navigate to the Categoryview and select Hardware and Sound.
Select “Power Options.”

From the left pane, select the option labeled “Choose what the power button does.”

Click the option to change the options that aren’t available right now.
To activate the functionality on Windows 11, select the Turn on fast startup option.

The operating system will boot up much more quickly when you finish the procedures.
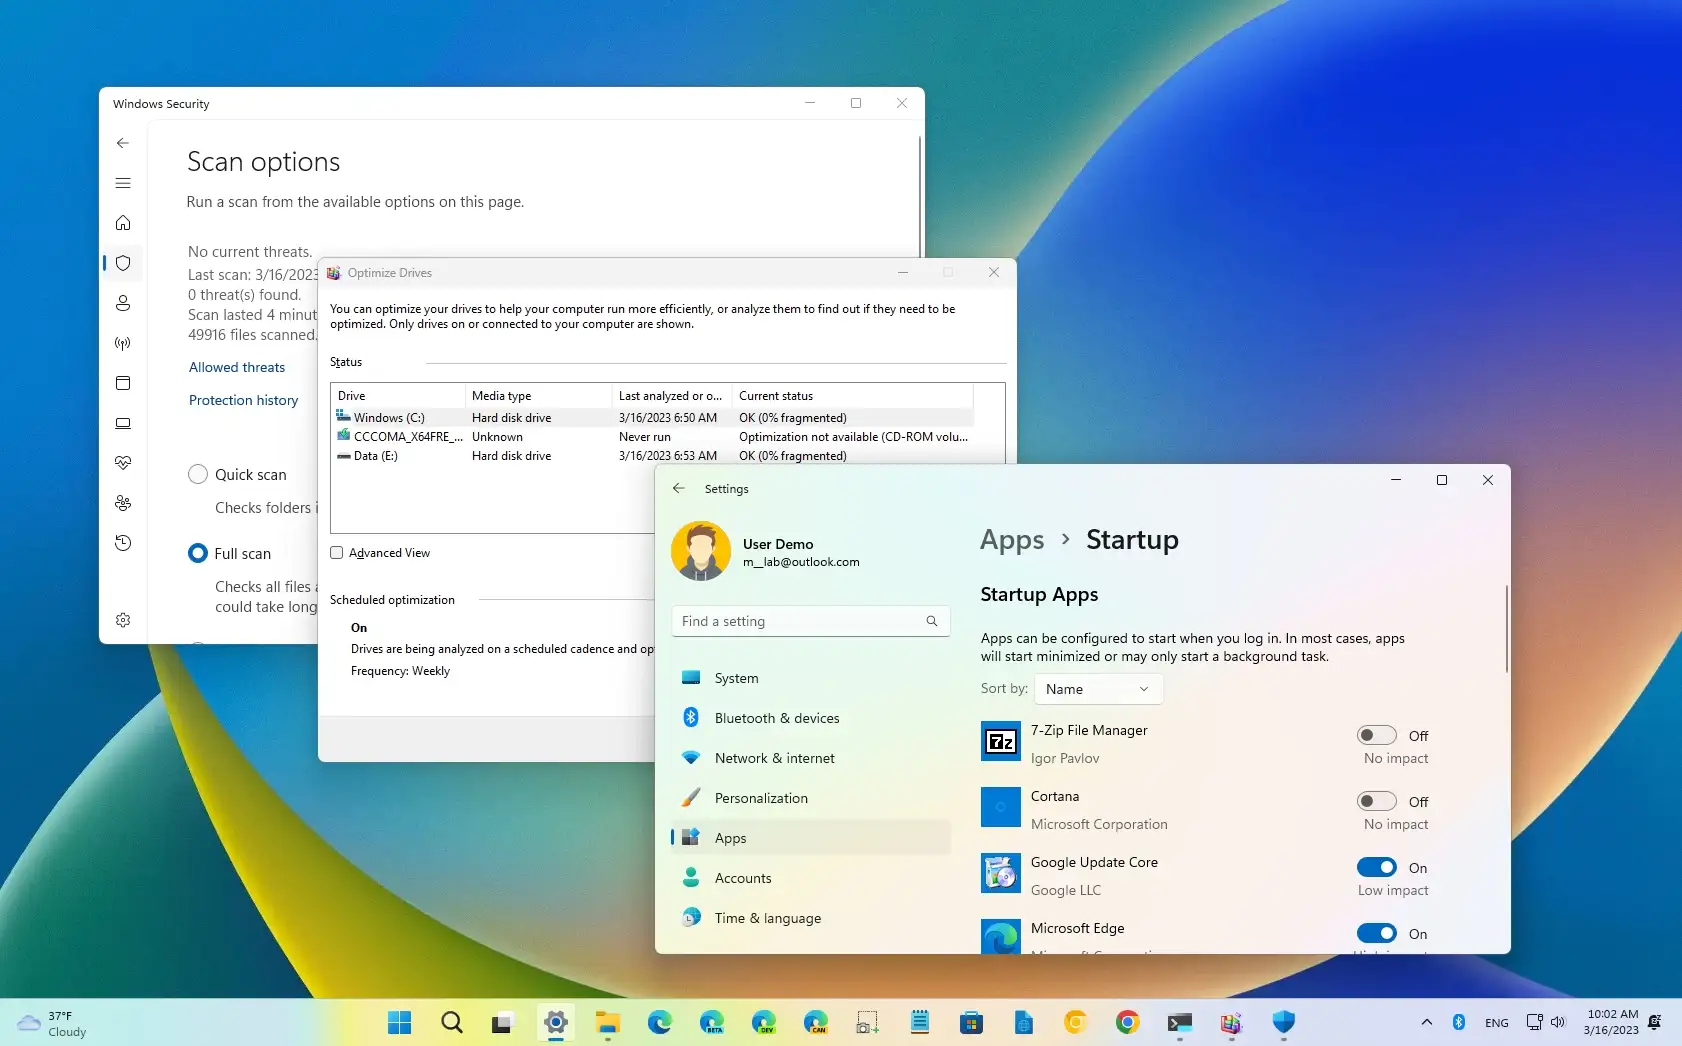
2. Disable apps from at startup
Certain applications have the ability to launch automatically when the computer starts up, which prolongs the startup period. You should turn off automatic app launches if you observe that your computer is taking a long time to start, that the system becomes sluggish rapidly, or that particular apps continually appearing when you log into your account.
Use these procedures to turn off startup programs so that Windows 11 starts more quickly:
Open the settings.
Select “Apps.”
On the Startup tab, click.
(Selective) Choose the Startup impact option and use the Sort by setting.
To disable apps at startup, turn off the toggle switch.

By following these instructions, you may speed up Windows 11’s startup and general performance by preventing the apps from starting up automatically.
3. Disable restartable apps
Additionally, Windows 11 offers a feature that allows you to easily resume where you left off by restarting apps that you had open in your last session. But the startup procedure may also be slowed down by this feature. On Windows 11, turning off restartable apps can assist reduce boot time.
Use these procedures to stop Windows 11 apps from relaunching immediately after you sign in:
Open the settings.
Select “Accounts.”
On the Sign-in choices tab, click.
Turn off the option to “Automatically save my restartable apps and restart them when I sign back intoggle switch” under the “Additional settings” section.

The computer should boot up a bit quicker the next time you restart the system after completing the procedures.
4. Change power mode
Windows 11 offers many groups of settings to regulate the computer’s energy consumption. You should think about switching to the best performance power mode if you want your computer to boot up faster. It’s also crucial to remember that a laptop powered by a power supply will always boot up more quickly than one powered by a battery.
Use these procedures to switch the power mode to high performance in order to accelerate boot times:
Open the settings.
Select “System.”
On the right, select the Power (or Power & battery) page.

In the Power mode setting, pick the “Best performance” option.

The system will switch to the best-performance power mode once you’ve finished the procedures, which should improve the timing of your computer’s startup.
5. Free up space
Usually, you should never operate a computer that has more than 70 percent of the hard drive space filled up because it ll affect performance and cause the boot process to take longer. To improve boot time and general performance, it’s a good idea to clear up storage if the system disk is nearing its limit. There are other ways to clear up space on Windows 11, but deleting the temporary files is the fastest one.
Use these procedures to remove temporary files from Windows 11 in order to clear up space:
Open the settings.
Select “System.”
On the right, click the Storagepage.
Under the Local Disk section, click theTemporary filessetting.

Select the temporary files to remove from Windows 11.
Click theRemove filesbutton.

Once you complete the steps, the hard drive should have more available space that will allow the system to operate more efficiently. Usually, you will notice an increase in speed during boot if the device was previously running out of space, which makes the system sluggish.
6. Virus scan
If a virus gets inside the system, it can cause a lot of damage, including making the system sluggish and preventing the device from starting up correctly. If you suspect that the computer has been infected with malware, you should perform a full virus scan to detect and remove the threat to secure the device and speed up the boot time on Windows 11.
To perform a full virus scan on Windows 11, use these steps:
Launch Windows 11.
To launch the software, search for “Windows Security” and select the top result.
Click onVirus & threat protection.
Under the Current threats section, click onScan options.

Select theFull scanoption to check the entire system for viruses and any other type of malware.

Click theScan nowbutton.
After you complete the steps, Microsoft Defender Antivirus will scan the device for viruses and other types of malware that could impact the system s performance and boot time. Alternatively, you can also perform anoffline scanto remove viruses that the antivirus may not be able to remove while Windows 11 is loaded.
7. Defragment drive
If you have a computer featuring a traditional hard drive, you can use the defragmentation tool available on Windows 11 to organize the contents of the drive to speed up boot time and the overall performance of the computer. This only applies to rotating platters hard drives. If the computer has an SSD, it s not necessary to run the defragmentation tool.
To defragment the system hard drive, use these steps:
OpenSettings.
Select “System.”
On the Storage tab, click.
Under the Storage management section, click onAdvanced storage settings.
Click theDrive optimizationsetting.

Select the primary drive and click theOptimizebutton.

Once you complete the steps, the system will organize the contents of the drive to make them easier to find, which translates into better performance, including boot times.
8. Upgrade memory and storage
If you have a computer with a traditional rotating platter hard drive, you should consider upgrading to a Solid-State Drive (SSD). The single upgrade will significantly speed up the system boot times and overall performance.
The reason is that a traditional hard drive typically rotates the platters at 5400 or 72000 RPMs and uses mechanical arms to read and write data on the storage, a process that limits the speed to up to 120 MB/s. On the other hand, an SSD doesn t have moving parts and offers typical speeds of 200 MB/s to 500 MB/s and beyond.
If the devices don t have enough memory can also affect performance. In the case that you have a system with 4GB or 8GB for memory, you should consider upgrading to 16GB or 32GB, depending on your needs.
If you notice that the memory and hard drive needs upgrading, it might indicate that it s time to purchase a new design.