On Windows 11, the
Windows Subsystem for Android (WSA)
is simply a virtual machine that offers the medium to install and run Android apps as if they were natively installed in the desktop version of Windows.
The only caveat is that every time you start an Android app on
Windows 11
, the system also has to start the virtual machine, adding extra time to get to the applications. However, if the computer has the resources to spare, there’s an option to allow the subsystem to stay always running in the background to speed up the app start process.
In this
guide
, you will learn the easy steps to allow WSA to run continuously on Windows 11.
-
Enable Windows Subsystem for Android option to run continuously
-
Enable Windows Subsystem for Android option to run as needed
Enable Windows Subsystem for Android option to run continuously
To allow WSA to always run in the background on Windows 11, use these steps:
Open
Start
on Windows 11.
Search for
Windows Subsystem for Android
and click the top result to open the app.
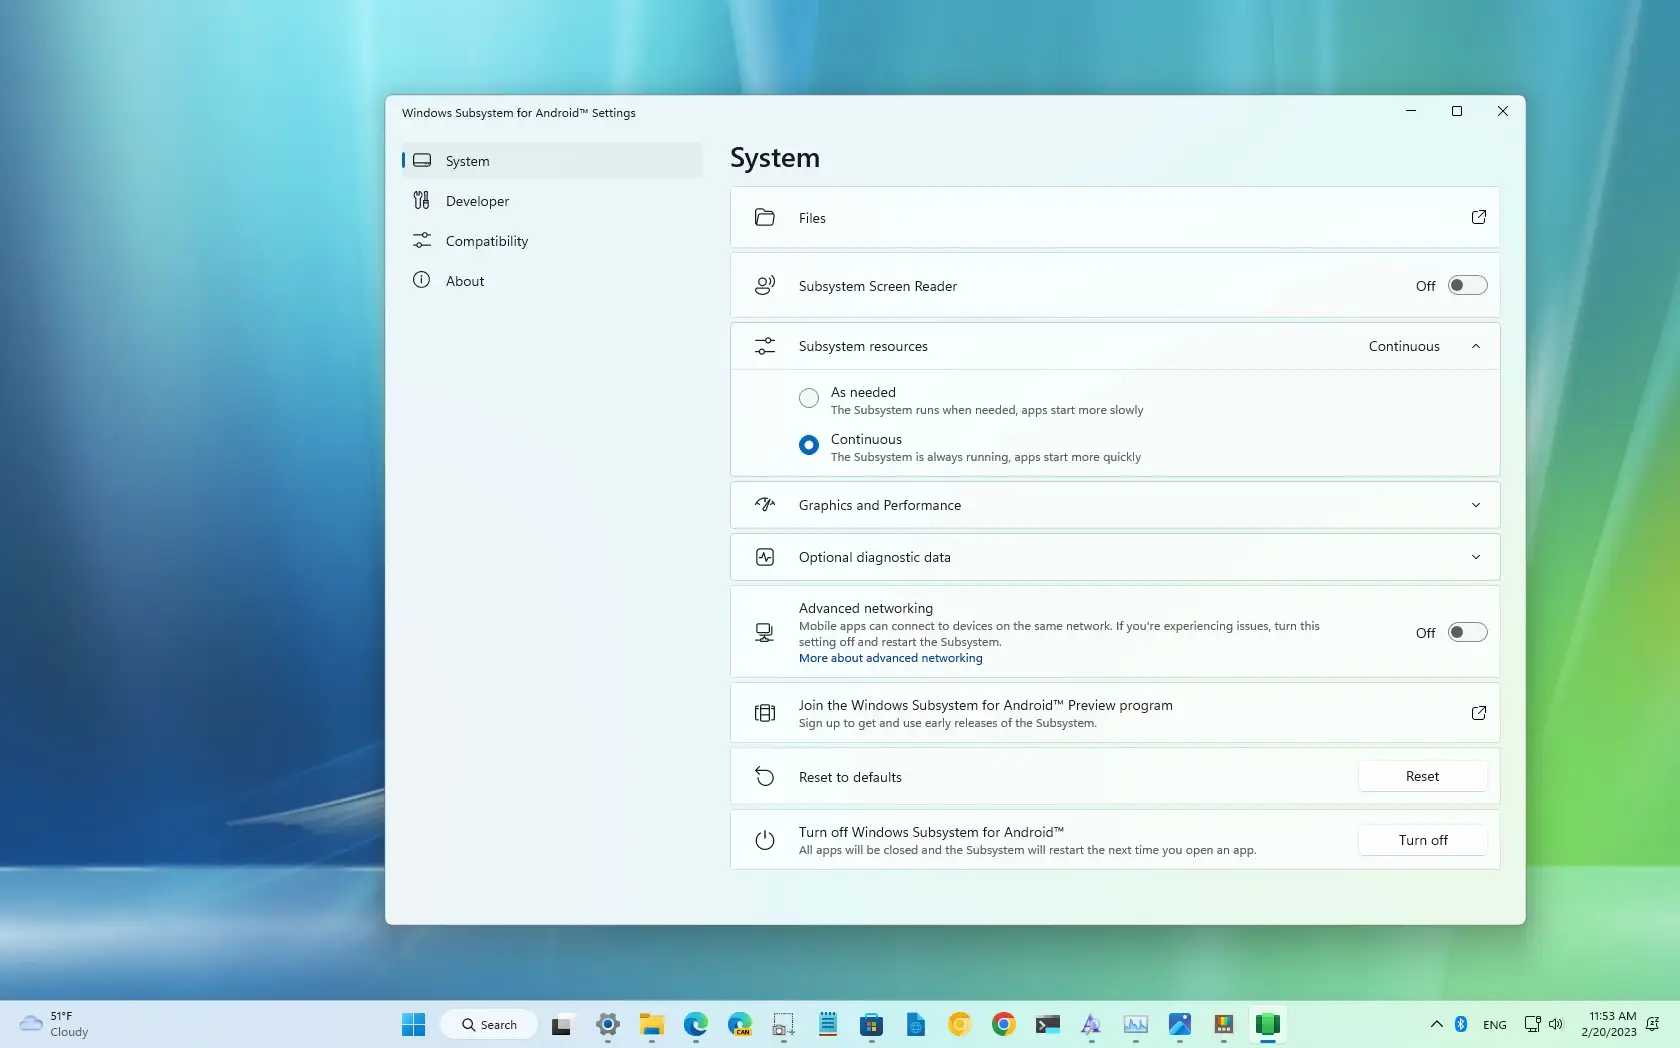
Click on
System
.
Click the “Subsystem resources” settings, and choose the
Continuous
option to allow WSA to always run in the background.

(Optional) Click the
“Turn off”
button when you need to shut down WSA on Windows 11.
Once you complete the steps, the Android virtual machine will keep running in the background, allowing you to launch apps more quickly.
Enable Windows Subsystem for Android option to run as needed
To run WSA only when an app starts, use these steps:
Open
Start
.
Search for
Windows Subsystem for Android
and click the top result to open the settings page.
Click on
System
.
Click the “Subsystem resources” settings, and choose the
As needed
option to start only when an Android app is running.
After you complete the steps, the subsystem will stay dormant until you start an application, but the startup will delay the application.