-
To remove printer and driver on Windows 10, open
Settings
>
Printers & scanners,
select the printer, and click
Remove device.
Then open
Print management
>
Custom Filters
>
All Drivers
, right-click the driver, and select
Delete.
-
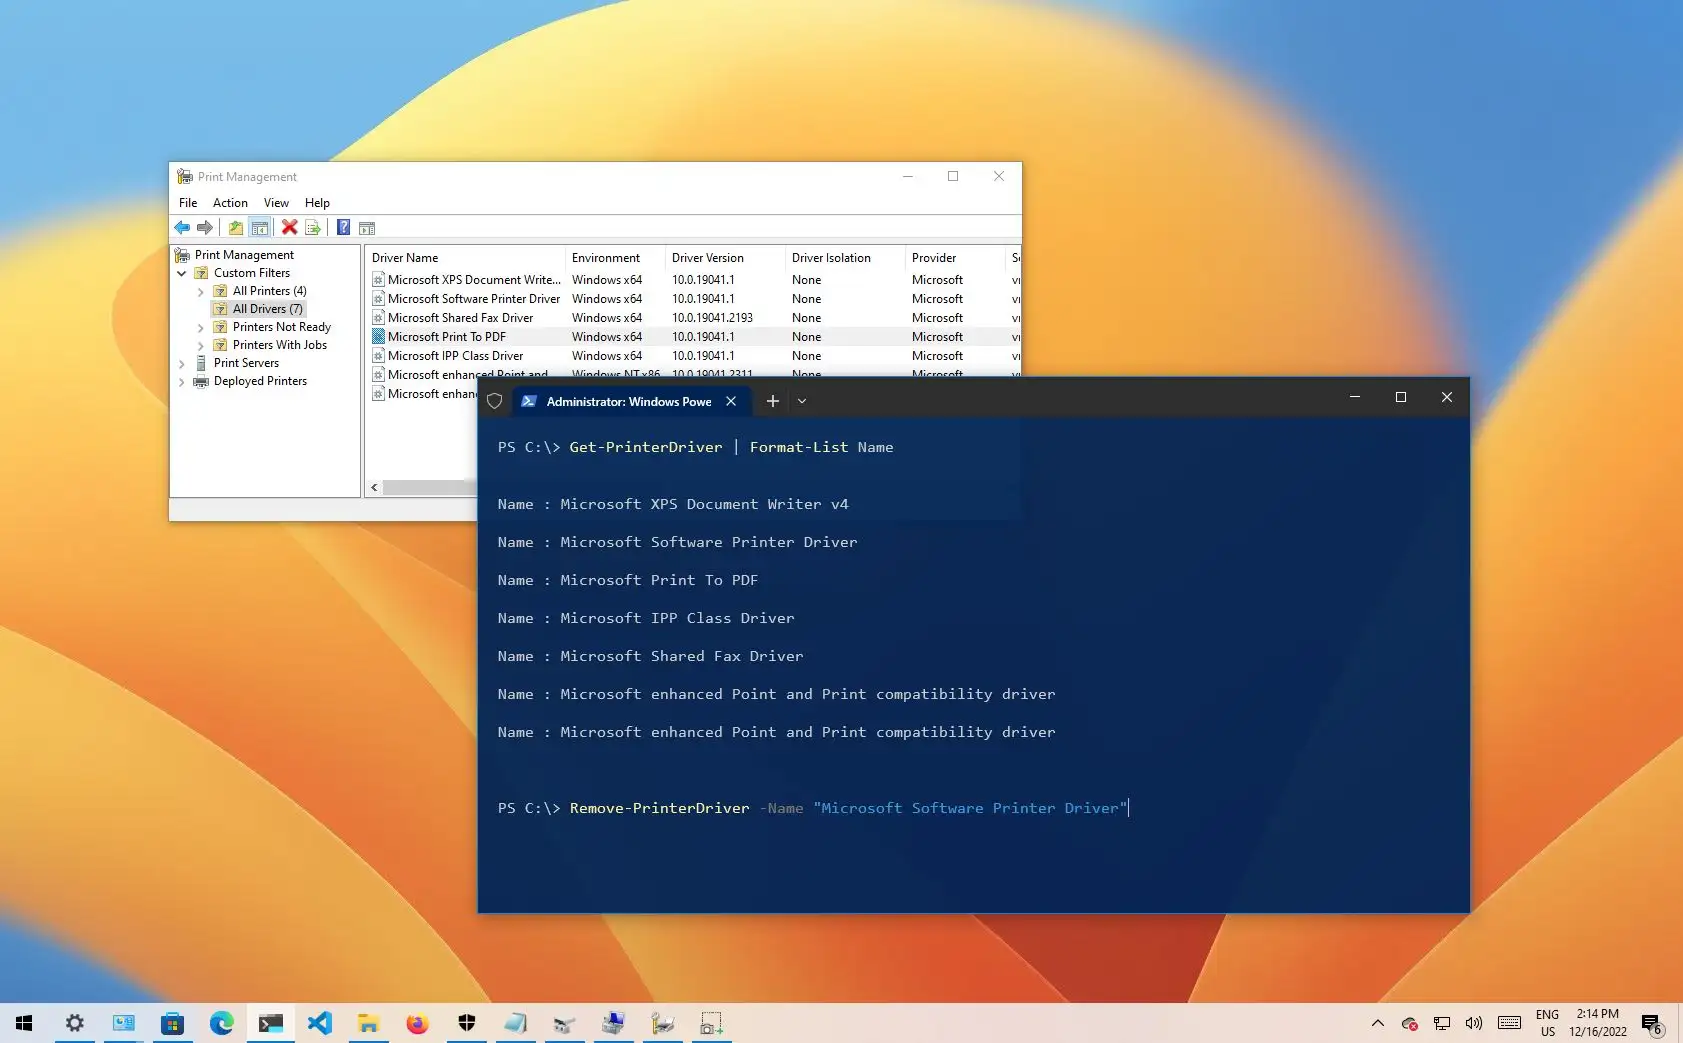
You can also remove a printer driver from PowerShell by running the
Get-PrinterDriver | Format-List Name
and
Remove-PrinterDriver -Name Your-Printer-Name
commands.
It’s likely that, as a mobile user using a laptop, you connect to numerous printers spread across various places, some of which you may use just once or twice. Because of this, you may eventually find that your computer has a large number of printers installed without you ever noticing.
Of course, you may use the Settings app to remove the devices you don’t need. You might not be aware, though, that removing a printer from Windows 10 does not remove its driver. Should you ever need them again, they will remain in a local inventory. While this method works well for rapidly reinstalling printers, removing the driver entirely from Windows 10 or earlier versions can help you stay organized, clear up space, and avoid (potential) printer driver issues.
This tutorial will show you how to remove printer drivers from Windows 10 entirely.
Delete printer completely from Windows 10
There are two steps involved in uninstalling a printer and driver from Windows 10. Using PowerShell or the Printer Management program, you must first uninstall the printer from the computer and then remove the driver files.
Remove printer from Settings
Follow these procedures to uninstall a printer from Windows 10:
Windows 10’s OpenSettings.
Select Devices.
On Printers & Scanners, click.
Choose the printer to remove from the Printers & Scanners section.
To remove the device, click the button.

Press the “Yes” button.
Following the procedures listed below, you can use Print Management or PowerShell to remove the driver from your machine. As an alternative, you can right-click the printer and choose the Remove device option to uninstall it from Control Panel>Hardware and Sound>Devices and Printers.
Delete printer driver from Print Management
Use these procedures to remove a printer driver:
LaunchStart.
To open the console, search for “Control Panel” and click the top result.
Select “System and Security.”
Select the Administrative Tools option.
Double-click the option for Print Management.
Make the Custom Filters branch larger.
From the navigation pane on the left, select All Drivers.
Choose the Delete option when you right-click the printer driver on the right side.

Press the “Yes” button.
The driver will be removed from the computer once you have finished the instructions. The procedures for removing additional printers from the device must be repeated if you have more than one.
Delete printer driver from PowerShell
Although the Print Management tool is not accessible on Windows 10 Home, you can still quickly delete the driver using PowerShell. These instructions are also applicable to Windows 10 Pro.
Use PowerShell to delete a print driver by following these steps:
LaunchStart.
Look up “PowerShell,” then right-click on the first result and choose “Run as administrator.”
To see a list of all the print drivers that are installed on Windows 10, use the following command and hit Enter:
To delete the print driver, use the following command and hit Enter:
Use the name that appears in step 3 to update the printer name in the command.If there are spaces in the name, the quote marks must be used. For instance, this command gets rid of Windows 10 Home’s Microsoft Software Printer Driver:

The printer driver will no longer be accessible on the system after you have finished the procedures. If you need to uninstall more printers in Windows 10, you might have to do it again.