On Windows 10, the
“Remote Desktop”
feature allows you to access a computer remotely to help other users or manage services without physically being present at the location.
While you can manage this feature through the
Settings app
, you can also enable Remote Desktop on
Windows 10
using PowerShell. You may want to use this method to create a script to configure Remote Desktop on multiple devices quickly or send an automated script to users to set up the feature automatically without additional steps.
This
guide
will teach you the steps to use PowerShell to enable (or disable) Remote Desktop on Windows 10 and open the required firewall ports for a successful connection.
-
Enable Remote Desktop from PowerShell
-
Disable Remote Desktop from PowerShell
Enable Remote Desktop from PowerShell
To enable the remote desktop protocol with PowerShell, use these steps:
Open
Start
on Windows 10.
Search for
PowerShell
, right-click the top result, and select the
Run as administrator
option.
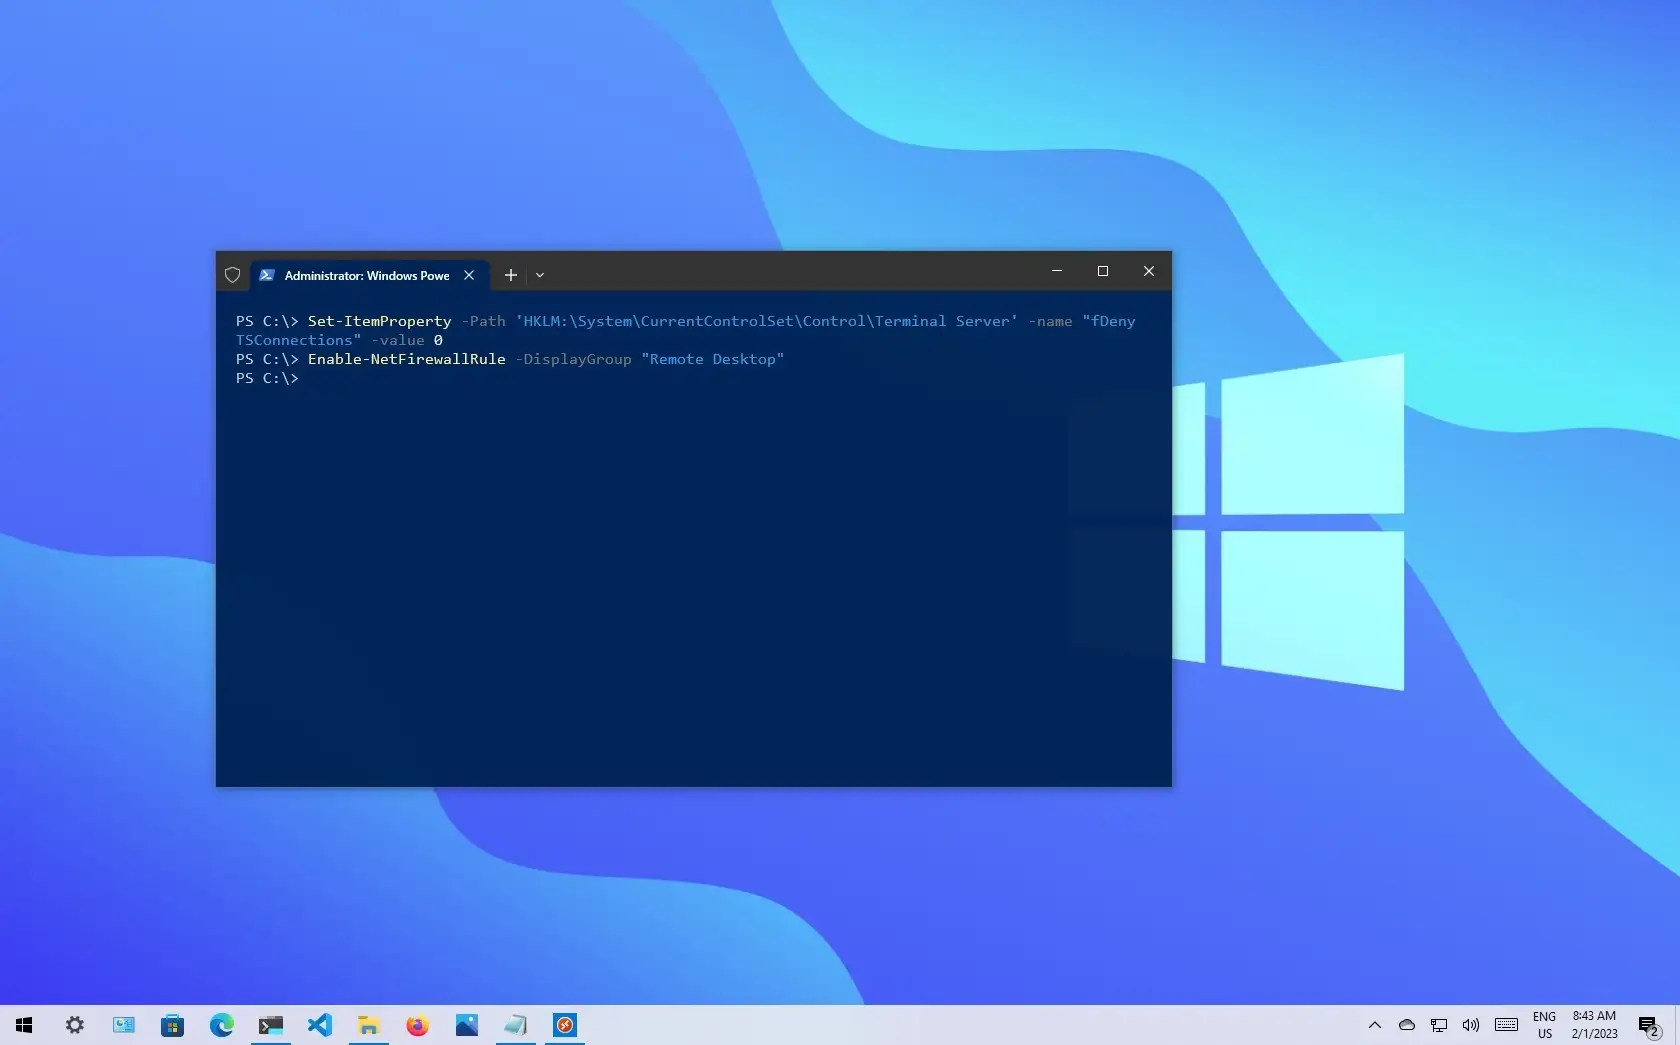
Type the following command to enable Remote Desktop on Windows 10 and press
Enter
:

(Optional) Type the following command to allow remote desktop through the Windows Firewall and press
Enter
:
Once you complete the steps, you can use the Remote Desktop modern app or the old Remote Desktop Connection app to access your computer remotely, even with the firewall enabled from Windows 10.
Disable Remote Desktop from PowerShell
To disable Remote Desktop from PowerShell on Windows 10, use these steps:
Open
Start
.
Search for
PowerShell
, right-click the top result, and select the
Run as administrator
option.
Type the following command to disable the remote desktop protocol and press
Enter
:

(Optional) Type the following command to disable Remote Desktop through the Windows Firewall and press
Enter
:
After you complete the steps, the Remote Desktop feature will be disabled, and the firewall port will be closed.
We’re focusing this guide on PowerShell, but you can use these
steps to perform the same tasks using Command Prompt
.