Your computer may occasionally lose connectivity to the local network and the internet if you are using Windows 11. Additionally, you can encounter problem messages such as Unidentified Network and Limited access. In this post, you will discover how to easily resolve the most typical issues with a wired network connection on Windows 11 by resetting the Ethernet adapter.
In order to fix driver issues and other connectivity issues, such as sluggish data transfers, Windows 11 offers a reset option for Ethernet devices.
It’s crucial to remember that a variety of things might affect networking, even if the Ethernet reset option can fix a lot of problems. For instance, the issue might be with the switch, router, cable, or adapter itself.
Disconnecting and rejoining the cable from the computer, switch, or router, as well as switching out the cable or port, may resolve slow speeds or a dramatic drop in speed from 1Gbps to 100Mbps.
This tutorial will show you how to reset the network adapters in Windows 11 if a wired connection isn’t functioning.
Fix Ethernet adapter problems on Windows 11
Use these procedures to resolve Ethernet network adapter issues in Windows 11 using the reset option:
OpenSettings on Windows 11.
On Network & Internet, click.
Select the Advanced Network Configuration option.

Click the Network Resetsetting button in the More settings area.

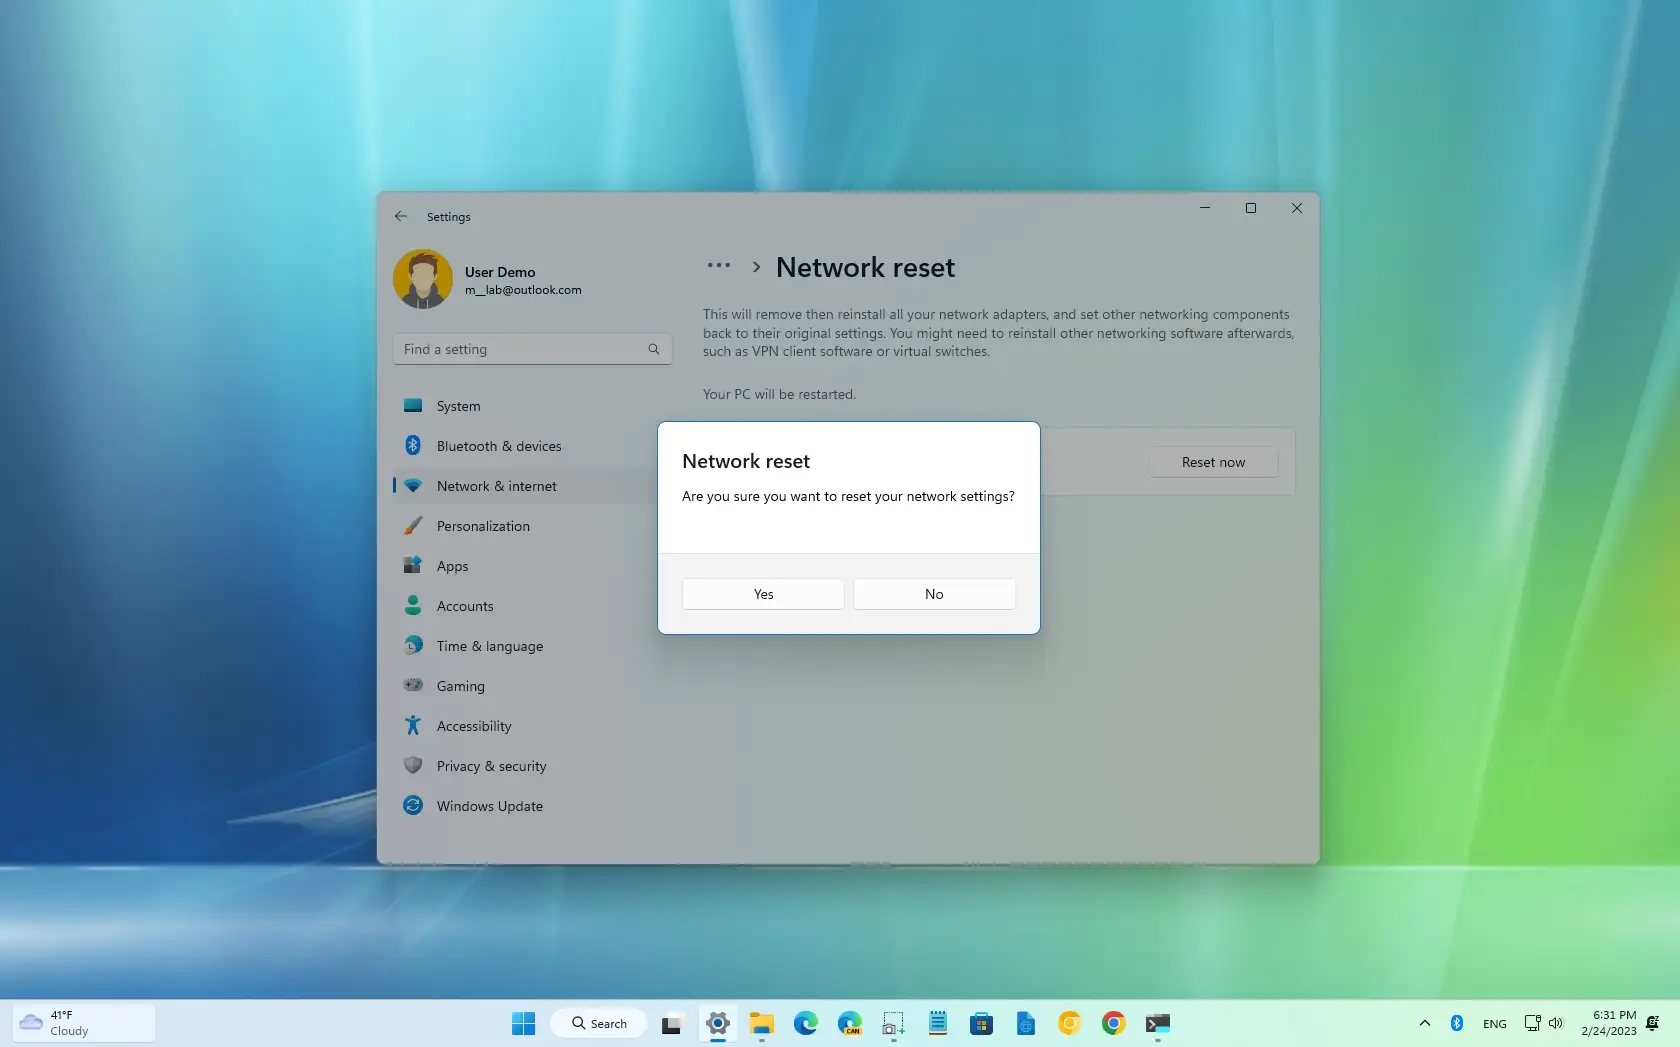
To resolve Windows 11’s Ethernet (wired) issues, click the “Reset now” option.

To confirm, click “Yes.”
Press the “Close” button.
Give your machine a restart.
You should be able to access the network and internet once more after completing the instructions.
When you use the reset option for an Ethernet device, Windows 11 will reinstall the network adapter driver and return all settings to their factory defaults, including the Windows Sucket (winsock). This eliminates the need for you to run the netsh winsock reset command.
If necessary, you might also need to reinstall or modify other networking software (such a VPN client).