Any hard drive, whether it’s a Solid-State Drive (SSD) or a conventional Hard Disk Drive (HDD), is likely to experience errors and other issues over its lifetime on Windows 11. For instance, you might have issues updating to a new version, the drive might vanish, or odd things like apps shutting up might happen.
Whatever the cause, the Check Disk tool in Windows 11 can be used to resolve the majority of logical issues with File Explorer, Command Prompt, and PowerShell.
A program called Check Disk (chkdsk) can check the file system’s integrity on a partition and fix any logical mistakes. If data does not write correctly, the command-line utility can also check for physical issues with the disk or fix faulty sectors.
This tutorial will show you how to identify and resolve issues with the secondary storage and Windows 11 installation disk.
-
Fix hard drive errors on Windows 11
-
Fix hard drive errors from Command Prompt
-
Fix hard drive errors from PowerShell
Fix hard drive errors on Windows 11
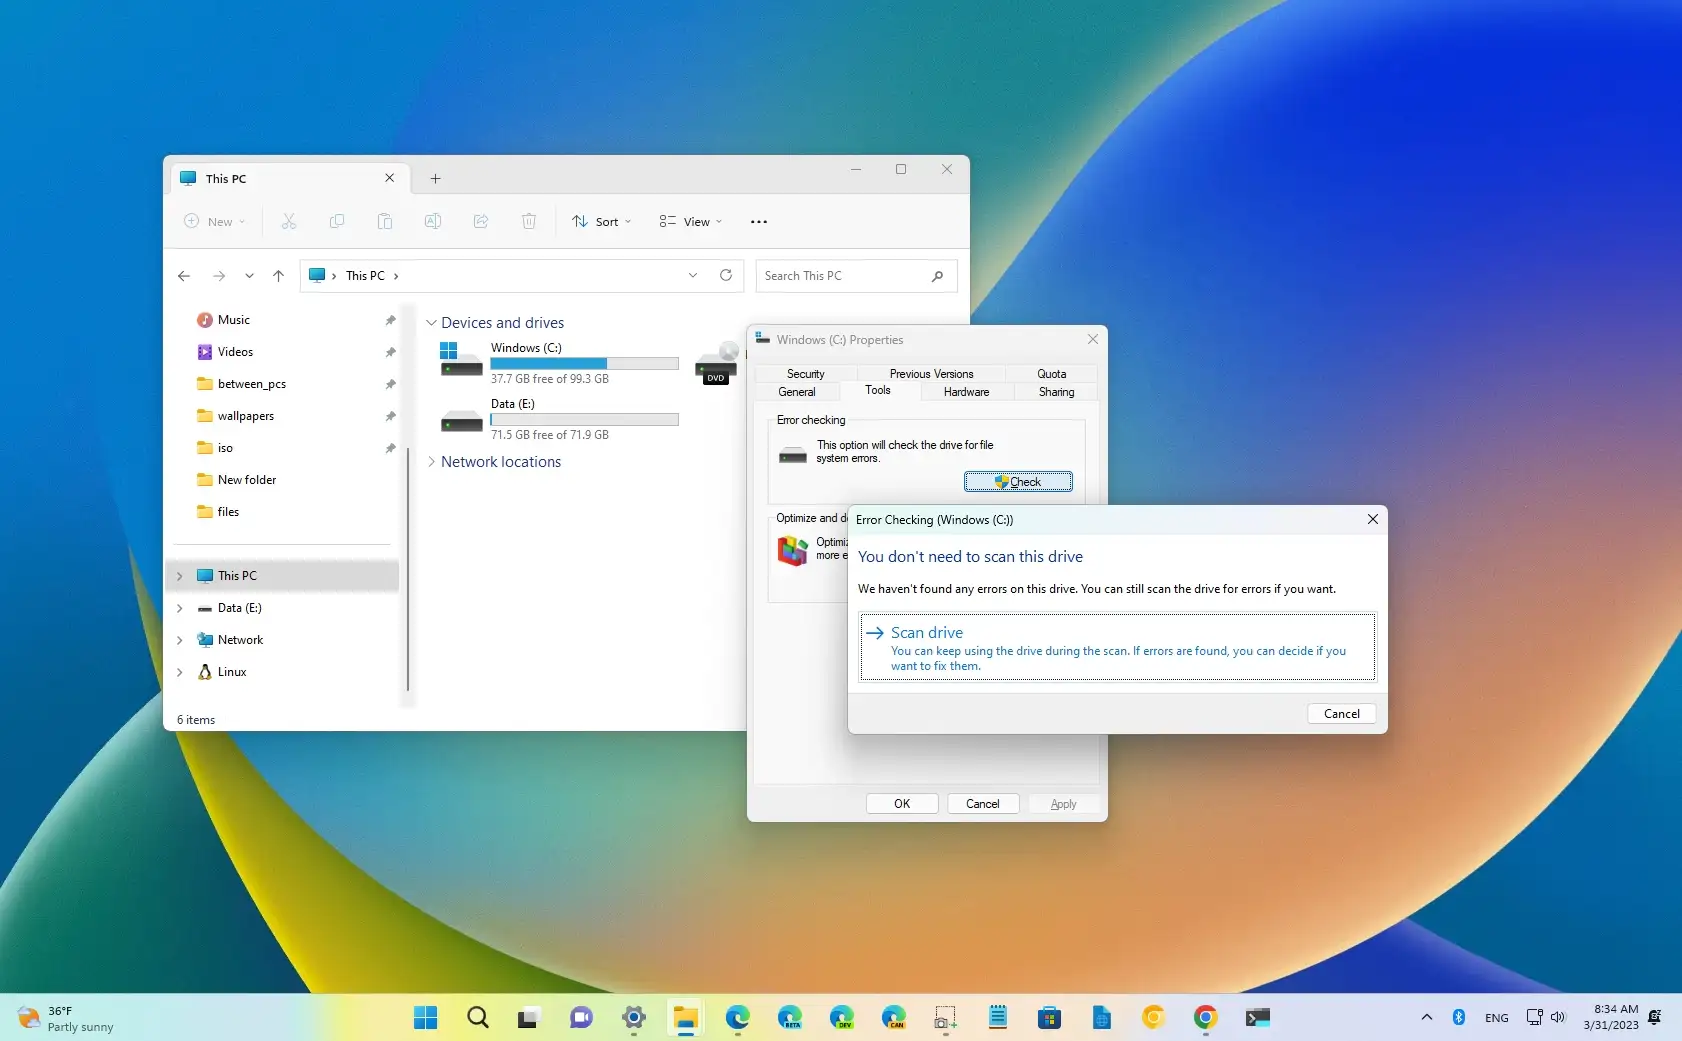
Use these steps to fix hard disk issues with Windows 11’s Check Disk:
On Windows 11, open File Explorer.
Select “This PC” from the pane on the left.
To examine and repair the hard disk, right-click on it and choose the Properties option under Devices and Drives.

Press the Toolstab button.
Click the Checkbutton under the Error checking section.

Select the option to scan the drive.

If the software finds no faults after you finish the instructions, click the Close button; if some errors cannot be fixed, you will be asked to schedule another scan for when you resume.
Fix hard drive errors from Command Prompt
The Check Disk (chkdsk) utility in the Command Prompt can also be used to check and repair hard drive issues.
Use the Command Prompt to resolve drive issues, such as faulty sectors, with Windows 11:
LaunchStart.
Look up “Command Prompt,” then right-click on the first result and choose “Run as administrator.”
To launch the chckdsk utility, type the following command and hit Enter:

To schedule the scan for the next restart, type Y and hit Enter.
(Selective) To repair damaged sectors on the hard disk, type the following command and hit Enter:
To schedule the scan for the next restart, type Y and hit Enter.
Bad sectors and errors should vanish after you finish the steps. Use thechkdsk /? command to find out more about the options that are available with chkdsk.
To fix errors, always start the Check Disk tool with the /fswitch. If you continue to have issues, try the Check Disk tool with the /roption, which also runs the command with the /foption enabled.
It is advised that you plan a scan for the next restart if issues are discovered during the scan but there are still open files.
Fix hard drive errors from PowerShell
The Repair-Volume cmdlet is PowerShell’s equivalent of the Check Disk tool. The PowerShell tool gives you more power, but it has almost the same capabilities as the Command Prompt tool.
Use these procedures to resolve hard disk issues using PowerShell commands:
LaunchStart.
Look up “PowerShell,” then right-click on the first result and choose “Run as administrator.”
To check for PowerShell issues, type the following command and hit Enter:

(Selective) To check the drive for problems displaying process data on the screen, type the following command and hit Enter:
If the preceding scan reveals errors, use the following command and hit Enter to fix the issues:
(Selective) To scan and fix volume problems, use the following command and hit Enter:

The PowerShell command will scan and resolve issues with the given hard drive once you have finished the steps.