-
To map network drive on Windows 10, open
File Explorer
>
This PC >
Map network drive,
select the drive letter, confirm the network path, and click
Finish.
-
Alternatively, on
Command Prompt
(non-admin), use the
net use \\SERVER\FOLDERPATH
command to map a drive. -
Another way is to open
PowerShell
(non-admin) and use the
New-PSDrive -Name LETTER -PSProvider FileSystem -Root \\SERVER\FOLDERPATH -Persist
command to mount a network drive on Windows 10.
This post will show you how to use File Explorer, Command Prompt, and PowerShell to map a network drive on Windows 10 so you can easily access files in a shared folder on another computer (or server) connected to the network.
In essence, Windows 10 creates a shortcut pointing to the network shared folder with a drive letter and access credentials when you connect to a disk using the Map Network Drive option. To provide you with instant access to the files saved on the distant computer, the mapped disk subsequently shows up on this PC under the Network locations area.
You may learn how to map a network drive in Windows 10 by following this instruction.
-
Map network drive on Windows 10 from File Explorer
-
Map network drive on Windows 10 from Command Prompt
-
Map network drive on Windows 10 from PowerShell
Map network drive on Windows 10 from File Explorer
Follow these instructions to map a network disk in Windows 10 using File Explorer:
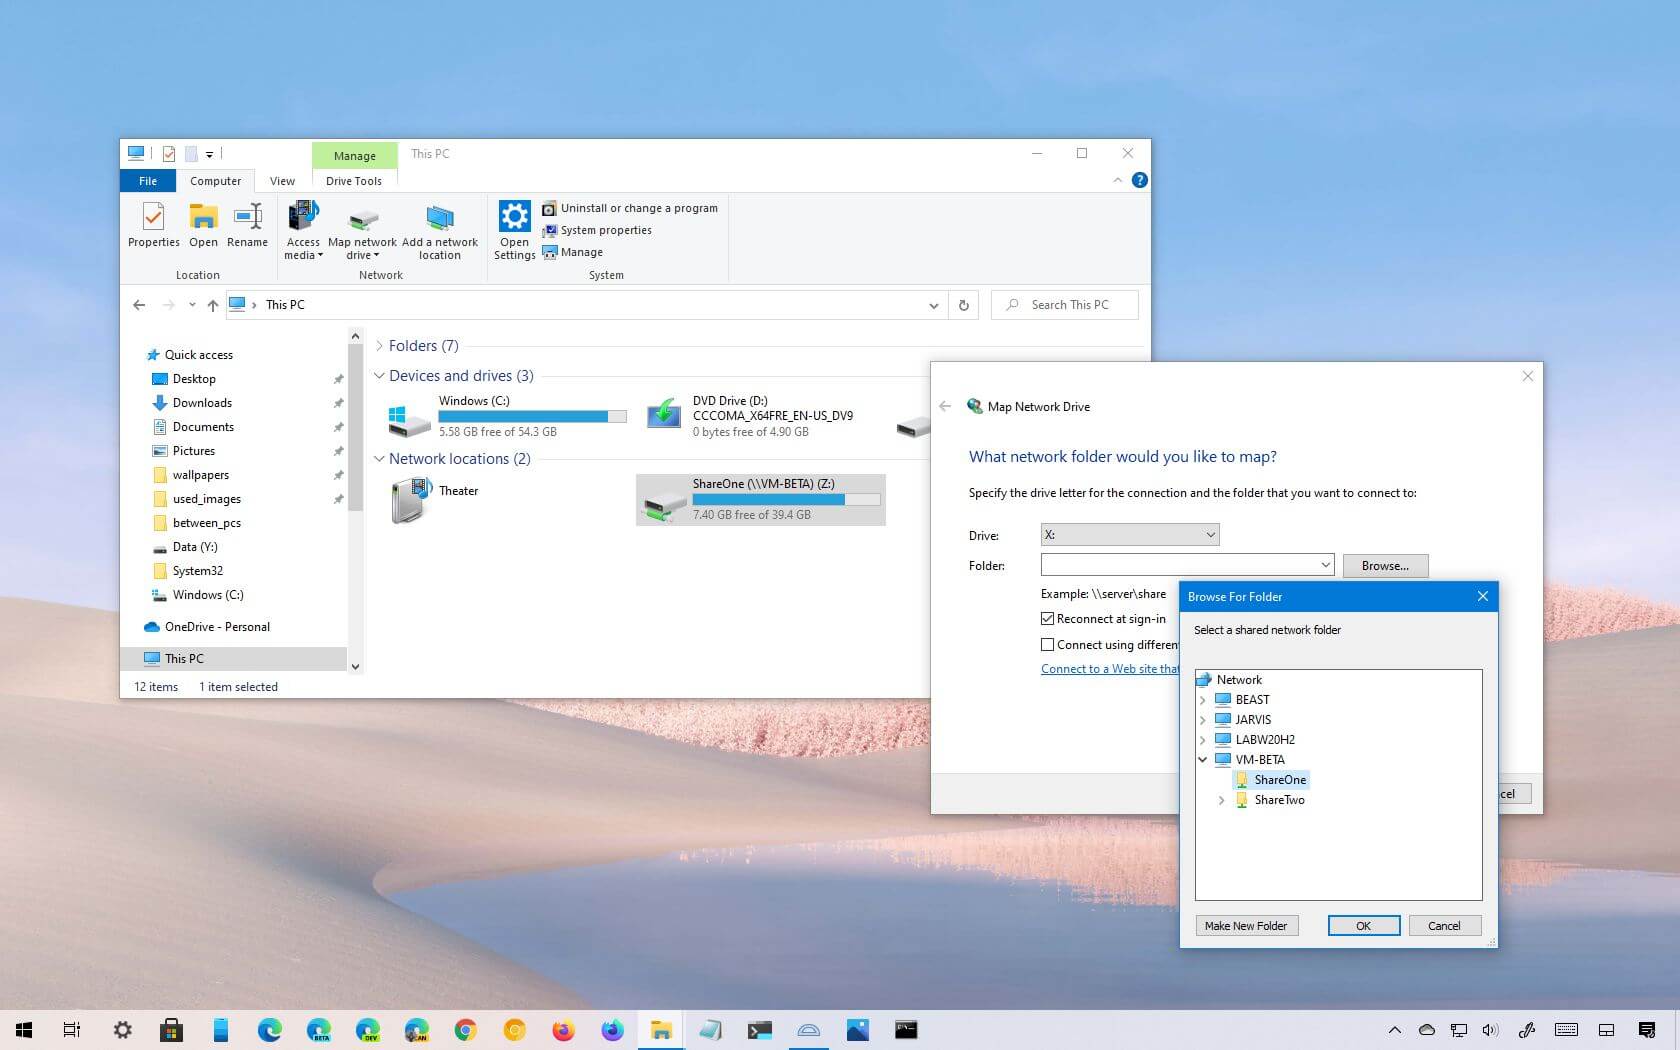
On Windows 10, open File Explorer.
Select “This PC” from the pane on the left.
Click the Computer tab and select the Map network drive option.

In the Drive setting, choose a letter to designate the drive.
Verify the shared folder’s path in the Folder option on Windows 10 before mapping it as a drive. (Alternatively, click the OK button after selecting the folder to map as a network drive by clicking the Browse option.)
To establish a permanent connection to the network location, use the Reconnect option during sign-in.
If the credentials differ from the account you currently use to log into Windows 10, make sure to check the Connect using different credentials option.
Press the “Finish.” button.

Verify the credentials for the network account (if applicable).
Press the “OK” button.
The drive will map and be accessible in File Explorer after you finish the procedures.
Use the IP address rather than the computer name if you are unable to access the shared folder. If the remote machine has a dynamic IP address configuration, though, it can change later and you might have to rejoin.
Map network drive on Windows 10 from Command Prompt
Follow these steps to map a network disk from the Windows 10 Command Prompt:
LaunchStart.
To open the console, search for “Command Prompt” and select the top result.
To manually map a drive by assigning a drive letter, type the following command and hit Enter:
Replace Z in the command with the drive letter you wish to use that isn’t already in use. Next, substitute DEVICE-NAME-OR-IP and SHARED-FOLDER for the shared folder’s name and the computer name or IP address of the device hosting it. This command, for instance, associates the computer with the Zdrive letter with the ShareOne folder:

To map a drive in Windows 10, type the following command, which will automatically assign the drive letter, and hit Enter:
The (*) option in the command gives the system the ability to assign any drive letter that isn’t being used. Next, substitute DEVICE-NAME-OR-IP and SHARED-FOLDER for the shared folder’s name and the computer name or IP address of the device hosting it. This command, for instance, maps the machine to the ShareOne folder:

To map a drive with authentication information, type the following command and hit Enter:
Replace Z in the command with the drive letter you wish to use that isn’t already in use. Next, modify DEVICE-NAME-OR-IPandSHARED-FOLDER for the shared folder’s name and the IP address or machine name of the device hosting it. To authenticate with the remote system, the credentials must be substituted for the PASSWORD and USERNAME. The folder can remain mapped after a reboot if the persistent option is selected. For instance, this command creates a persistent mapping and provides user credentials by mapping the ShareOne folder:

The network-shared folder will map on the device and show up in File Explorer after you finish the instructions.
Map network drive on Windows 10 from PowerShell
Follow these steps to map a network drive from Windows 10 PowerShell:
LaunchStart.
Look up “PowerShelland.” To open the console, click the top result.
In Windows 10, type the following command and hit Enter to manually map a drive and assign a drive letter:
Replace DRIVE-LETTER in the command with the drive letter you wish to use that isn’t already in use. Then, modify DEVICE-NAME-OR-IPandSHARED-FOLDER for the shared folder’s name and the computer name or IP address of the device hosting it. This command, for instance, associates the computer with the drive letter E with the ShareOne folder:

The network shared folder will map on the machine and show up in File Explorer after you finish the instructions.
Use these steps if you need to map a disk using credentials.