-
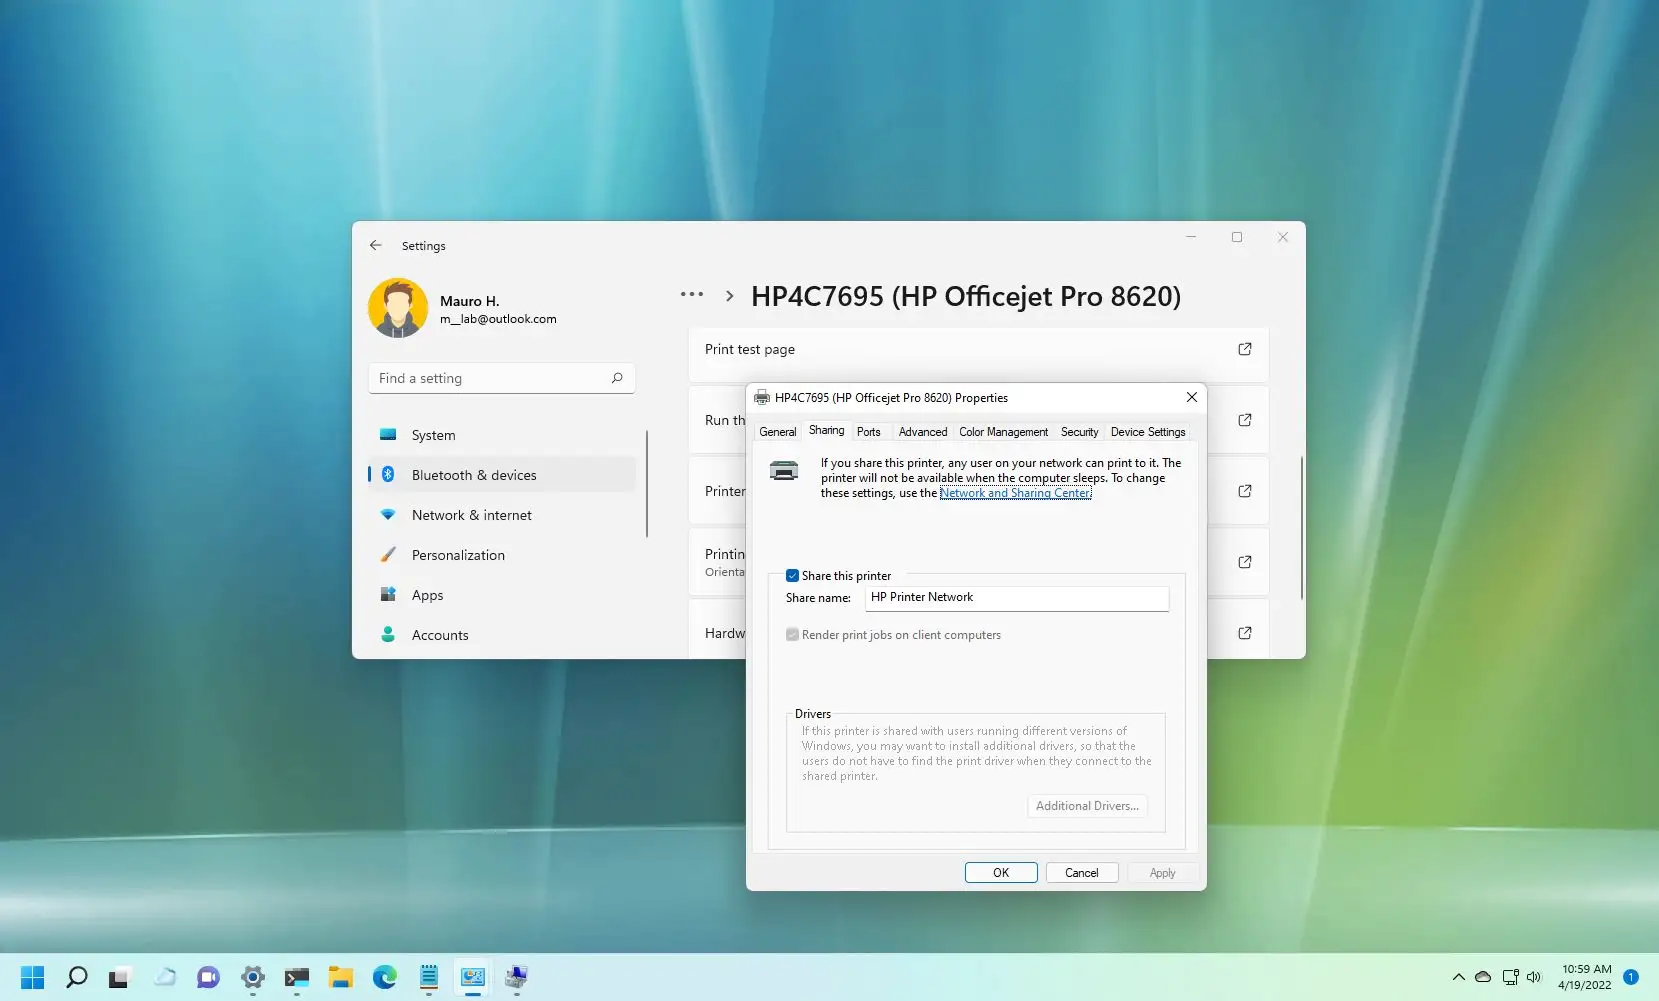
To share printer on Windows 11, open
Settings
>
Printers & scanners
, choose the printer to share, click on
Printer properties,
open the
Sharing
tab, click
Change Sharing Options,
check
Share this printer,
and click
OK.
-
You may also need to change the network profile type to
Private
from
Settings
>
Network & internet
>
Ethernet
or
Wi-Fi
to enable print sharing on Windows 11.
If a printer in Windows 11 does not have a wired or wireless connection, it can still be shared inside the network. The Windows 11 print server function, which enables the rapid conversion of any local printer (including those connected via a USB or DB-25 cable) into a network printer, can be used to do this task.
This post will teach you how to share a USB printer over a network in Windows 11.
Share printer on Windows 11
In Windows 11, follow these procedures to share a printer in the network from Settings:
OpenSettings on Windows 11.
On Network & Internet, click.
On the Ethernet or Wi-Fi tab, click.
To allow print sharing on the computer, choose the Private option under the Network profile type section.

Click on Devices & Bluetooth.
Press the “Printers & scannerstab” button.

To share the USB printer across the network, choose it.

On the Printer Properties tab, click.

Go to the Sharing tab.
If applicable, click the “Change Sharing Options” option.

Verify the option to “Share this printer.”

(Optional) Give the printer a new name.
Press the “Apply” button.
Press the “OK” button.
After you’ve finished the procedures, anyone can connect to the USB printer on the network.
Connect to shared printer
While attaching a shared printer to a local network computer is simple, it differs from installing a wireless printer.
Follow these instructions to set up a shared printer in Windows 11:
Open the settings.
Click on Devices & Bluetooth.
The Printers & Scanners setting should be clicked.
After selecting the “Add device” button, give it a few seconds.
Select the “Add manually” option.

Verify the option to choose a shared printer by name.
Verify the printer’s network path, such as \\10.1.4.120\The HP Network Printer.

Press the “Next” button.
To install the shared USB printer in Windows 11, click Next.
Press the “Finish.” button.
Following your completion of the steps, the print jobs will proceed to the USB printer and the computer hosting the print server via the network. As long as the computer sharing the printer is powered on, users will be able to print.
Open Control Panel>Network and Internet>Network and Sharing Center>Advanced sharing settings. Under the Password protected sharing section, choose the Turn off password protected sharing option. Then, click the Save Changes button if the system is requesting a username and password and you are unable to connect to the printer. If this doesn’t work, you might need to connect to the printer from the destination computer using a typical local account that was created on the source computer.